Understanding Interactions in Divi 5
Interactions in Divi 5 are not just limited to simple popups; they are a versatile tool that enables you to create a wide range of interactive elements. By defining triggers, effects, and targets, you can bring your website to life in previously challenging ways. In JavaScript and other programming languages, interactions are known as events and are triggered by client-side actions, such as mouse scrolling, button clicks, etc.
What Are Interactions?
Interactions are customizable actions that occur in response to user behavior. For instance, you can set an interaction to trigger when a user clicks a button or hovers over an image. The effect can range from changing visibility to applying animations, and the target is the specific element that responds to the interaction.
Why Use Interactions?
Incorporating interactions into your website design can significantly enhance user experience. Here are a few reasons to consider:
- Engagement: Interactive elements keep users engaged and encourage them to explore your content further.
- Visual Appeal: Well-designed interactions can make your website visually appealing, drawing attention to key areas.
- Functionality: Interactions can improve the functionality of your site, making it easier for users to navigate and find information.
Getting Started with Interactions
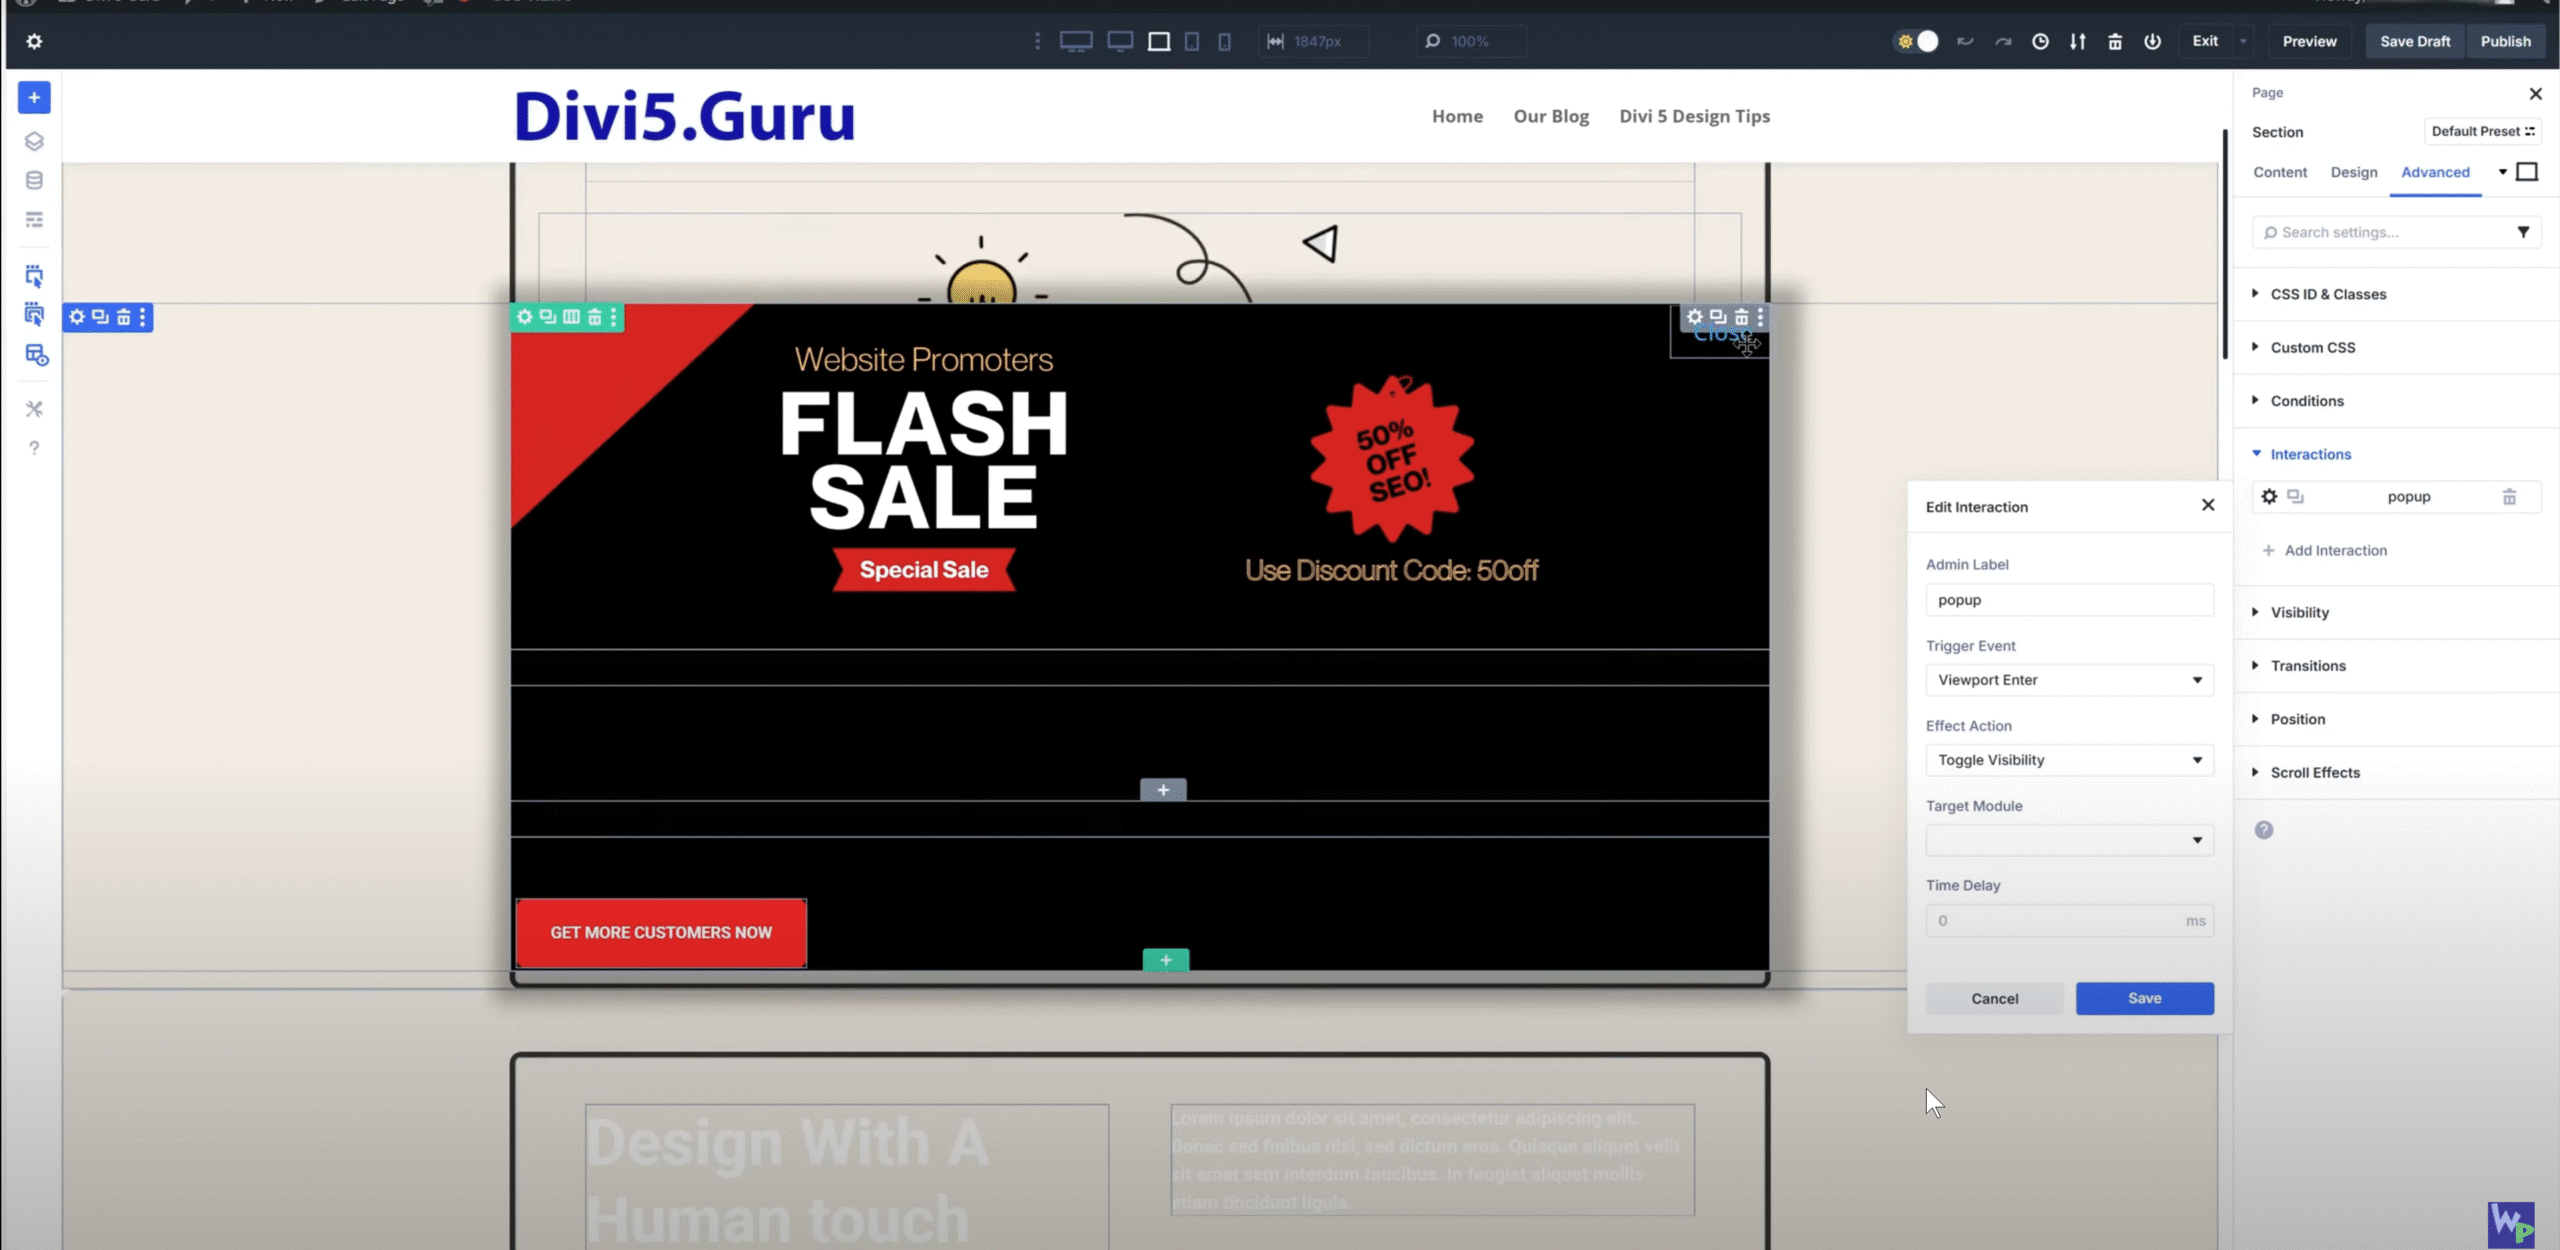
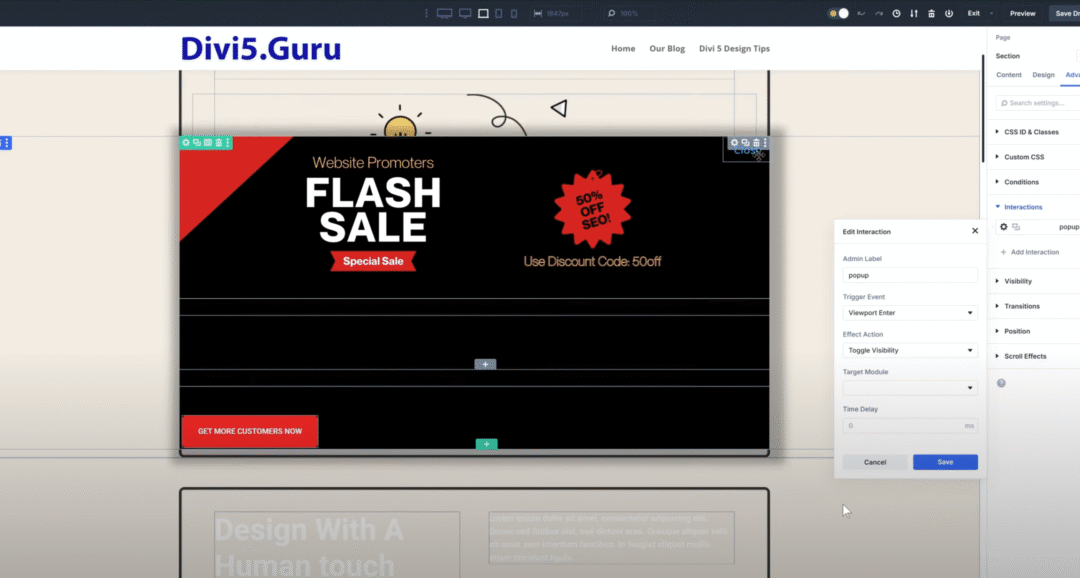
This is what the UI should look like after the Divi 5 interactions have been set.
To begin using interactions in Divi 5, follow these steps:
Step 1: Access the Interactions Editor
- Open the Divi Builder on the page where you want to add interactions.
- Select the element you wish to modify (e.g., a button or image).
- Navigate to the Advanced tab in the settings panel.
- Click on the Add Interaction button to open the Interactions Editor.
Step 2: Define Your Trigger
In the Interactions Editor, the first step is to define the trigger for your interaction. Here are some common triggers you can use:
- Click: The interaction will occur when the user clicks on the element.
- Hover: The interaction will activate when the user hovers over the element.
- Enter Viewport: The interaction will trigger when the element enters the user’s viewport while scrolling.
Step 3: Choose Your Effect
Once you have set your trigger, the next step is to choose the effect that will occur. Some popular effects include:
- Toggle Visibility: Show or hide an element based on the trigger.
- Animate: Apply animations such as fade, slide, or zoom.
- Change Attribute: Modify attributes, such as CSS classes or IDs.
Step 4: Set the Target
Finally, you need to specify the target element that will respond to the interaction. This could be the same element that triggers the action or a different one entirely. For example, you might want a button to show a hidden section of content when clicked.
Practical Applications of Interactions
Now that you understand the basics of setting up interactions, let’s explore some practical applications.
Example 1: Creating a Popup
Popups are a great way to capture user attention. Here’s how to create one using interactions:
- Add a Section: Create a new section for your popup content.
- Set the Trigger: Use the Enter Viewport trigger for the section.
- Choose the Effect: Select Toggle Visibility to show the popup when it enters the viewport.
- Target the Popup: Ensure the popup section is the target of the interaction.

The close button on this popup also utilizes Divi 5 interactions.
Example 2: Building a Toggle for Pricing Tables
If you want to allow users to switch between monthly and yearly pricing, follow these steps:
- Add Two Rows: Create two rows for monthly and yearly pricing.
- Set Triggers: Use click triggers on buttons labeled “Monthly” and “Yearly.”
- Choose Effects: Set the effect to Toggle Visibility for each row.
- Target the Rows: Ensure each button targets the corresponding pricing row.
Example 3: Mouse Movement Effects
Mouse movement effects can add a fun and interactive element to your site. Here’s how to implement them:
- Select a Hero Section: Choose a prominent section on your page.
- Add Mouse Movement Effects: In the Interactions Editor, set effects like opacity changes or slight movements based on mouse position.
- Define Sensitivity: Adjust the sensitivity settings to control how responsive the elements are to mouse movements.
Advanced Features of Interactions
As you become more familiar with interactions, you can explore advanced features that enhance your design capabilities.
Nested Interactions
Nested interactions allow you to create complex interactions by nesting multiple triggers and effects. For example, you can have a button that not only shows a popup but also changes its color when hovered over.
Conditional Logic
Conditional logic enables you to set interactions based on specific conditions. For instance, you can show a popup only if a user has not previously interacted with it, using cookies to track user behavior.
Scroll-Based Effects
Scroll-based effects can create a dynamic experience as users navigate your site. You can set elements to animate or change visibility based on the user’s scroll position, adding depth to your design.
Tips for Maximizing Interactions
To get the most out of interactions in Divi 5, consider the following tips:
- Test Across Devices: Ensure that your interactions work seamlessly on various devices, including desktops, tablets, and smartphones.
- Keep It Simple: While interactions can be powerful, avoid overloading your site with too many effects, which can distract users.
- Use Analytics: Track user interactions to understand how visitors engage with your site and adjust your design accordingly.
Conclusion
Interactions in Divi 5 offer a wealth of opportunities to enhance your website’s functionality and user experience. By understanding how to set up triggers, effects, and targets, you can create engaging elements that captivate your audience. Whether you’re building popups, toggles, or scroll-based effects, the possibilities are endless. Start experimenting with interactions today and watch your website come to life!
For more information on Divi 5 and its features, check out the official Elegant Themes website.
0 Comments