Unlocking the Power of Nested Presets in Divi 5
The introduction of Divi 5 has revolutionized the way web designers approach site creation, particularly with the introduction of nested presets. This feature allows users to apply multiple design presets simultaneously, enhancing flexibility and efficiency in web design. In this article, we will explore the concept of nested presets, how they work, and the benefits they bring to your design workflow.
Understanding Divi 5 and Its Design System
Divi 5 is a powerful website builder that offers a robust design system, enabling users to create visually stunning websites without extensive coding knowledge. At the heart of this system are presets, which are collections of styles that can be applied to various elements, including modules, rows, and sections.
What Are Presets?
Presets in Divi 5 serve as a way to maintain consistency across your website. They allow you to define specific styles for elements such as typography, colors, and spacing. When you create or edit a preset, all elements using that preset are updated automatically, ensuring a cohesive design throughout your site.
The Role of Nested Presets
Nested presets take this concept a step further by allowing you to incorporate option-level presets within element presets. This means you can create a preset for a specific design option, like border radius or text styling, and then nest it within a broader element preset. This hierarchical structure simplifies the management of design tokens, making it easier to maintain consistency across your site.
The Benefits of Using Nested Presets
Enhanced Flexibility
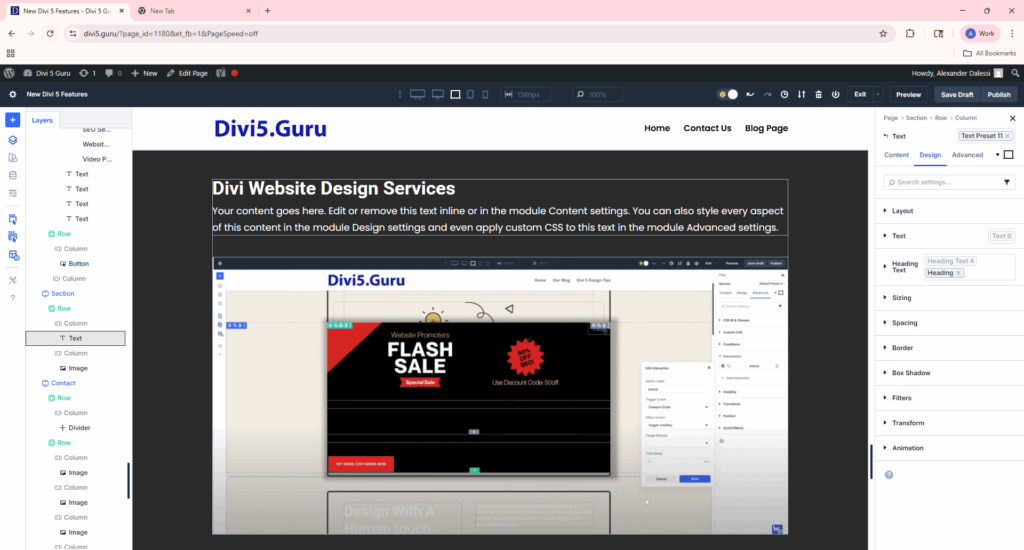
One of the primary advantages of nested presets is the flexibility they offer. By allowing you to stack multiple presets, you can easily customize elements without having to create entirely new presets for every variation. For instance, you can apply a “Dark Mode” preset alongside a “Left Image” preset, enabling you to achieve a specific look without sacrificing design integrity.
Streamlined Workflow
Nested presets significantly streamline your design workflow. Instead of manually adjusting each element, you can apply a single element preset that automatically includes all nested option presets. This not only saves time but also reduces the risk of inconsistencies across your design.
Simplified Updates
When you update a nested preset, all elements that utilize it are updated simultaneously. This feature is particularly beneficial for maintaining a consistent design language across your site. For example, if you decide to change the border radius of a button, updating the nested preset will automatically apply that change to all buttons using that preset.
How to Create and Use Nested Presets

Step 1: Creating an Option Preset
To create an option preset, navigate to the settings panel of any module. Locate an option group, such as “Border,” and configure the desired style (e.g., setting an 8 px border radius). Save this configuration as a new preset.
Step 2: Nesting Inside an Element Preset
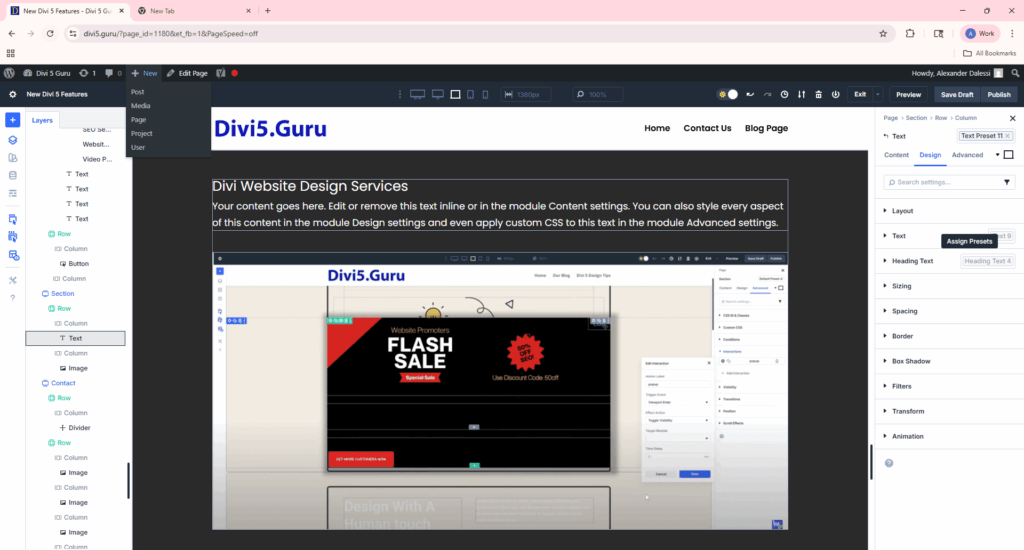
Next, you can nest this option preset within an element preset. Edit or create an element preset, such as a “Blurb Module” preset. In the preset settings, look for a section that allows you to add option presets. Select your previously created option preset to nest it.
Step 3: Applying the Element Preset
When you apply the element preset to a module, Divi will automatically apply its nested option presets. This means that any time you use the blurb preset, the rounded corners will be applied without any additional effort on your part.
Combining Stacked and Nested Presets
The true power of Divi 5 lies in the ability to combine stacked and nested presets. By stacking multiple presets on an element, you can create complex designs that are still easy to manage. For example, you might stack a “Dark Mode” preset with an “Image Alignment” preset while nesting a typography option preset within an element preset.

Practical Example
Imagine you are designing a call-to-action section. You can stack a “Primary Button” preset with a “Hover Effect” preset while nesting a typography preset for the button text. This approach allows you to create a visually appealing and functional button that adheres to your overall design system.
Tips for Maximizing Nested Presets
Plan Your Presets
Before diving into the design process, take some time to plan your presets. Identify base styles, such as light and dark modes, and build your presets around them. This will help you maintain consistency and streamline your workflow.
Test Stacking Order
When using stacked presets, be mindful of the order in which you apply them. If two presets set the same option, the later one in the stack will take precedence. Testing the stacking order can help you achieve the desired design outcome.
Utilize Design Variables
Combine nested presets with design variables to create a scalable design system. Design variables allow you to adjust colors, fonts, and spacing globally, making it easier to maintain a cohesive look across your site.
Experiment in a Staging Environment
Before applying your nested presets to a live site, consider experimenting in a staging environment. This will allow you to understand how the presets interact and make any necessary adjustments without affecting your live site.
Conclusion
Nested presets in Divi 5 represent a significant advancement in web design capabilities. By allowing you to stack and nest presets, Divi 5 empowers designers to create complex, visually appealing websites with ease. The flexibility, streamlined workflow, and simplified updates offered by nested presets make them an invaluable tool for any web designer. Embrace the power of Divi 5 and take your website design to the next level.
For more information on Divi 5 and its features, check out the official Elegant Themes blog.
